/(^0^)/ Sara’s glove prototype #3
https://wearablesoftinteractions.us/2016/05/06/saras-glove-prototype-3-team-danazour/
/(^0^)/ Instructables post : http://www.instructables.com/id/Blinking-Shark-Puppet/
/(^0^)/ Sara’s glove prototype #2
Team Danazaur Instructions for Sara’s Glove Prototype #2
/(^0^)/ Dynamic textile in the link below
https://wearablesoftinteractions.us/?p=2041
/(^0^)/ High five switch is below Sara’s prototype #1
/(^0^)/ Sara’s prototype #1
- SARA’S GLOVE
Team Danazaur with Zoe Rogers
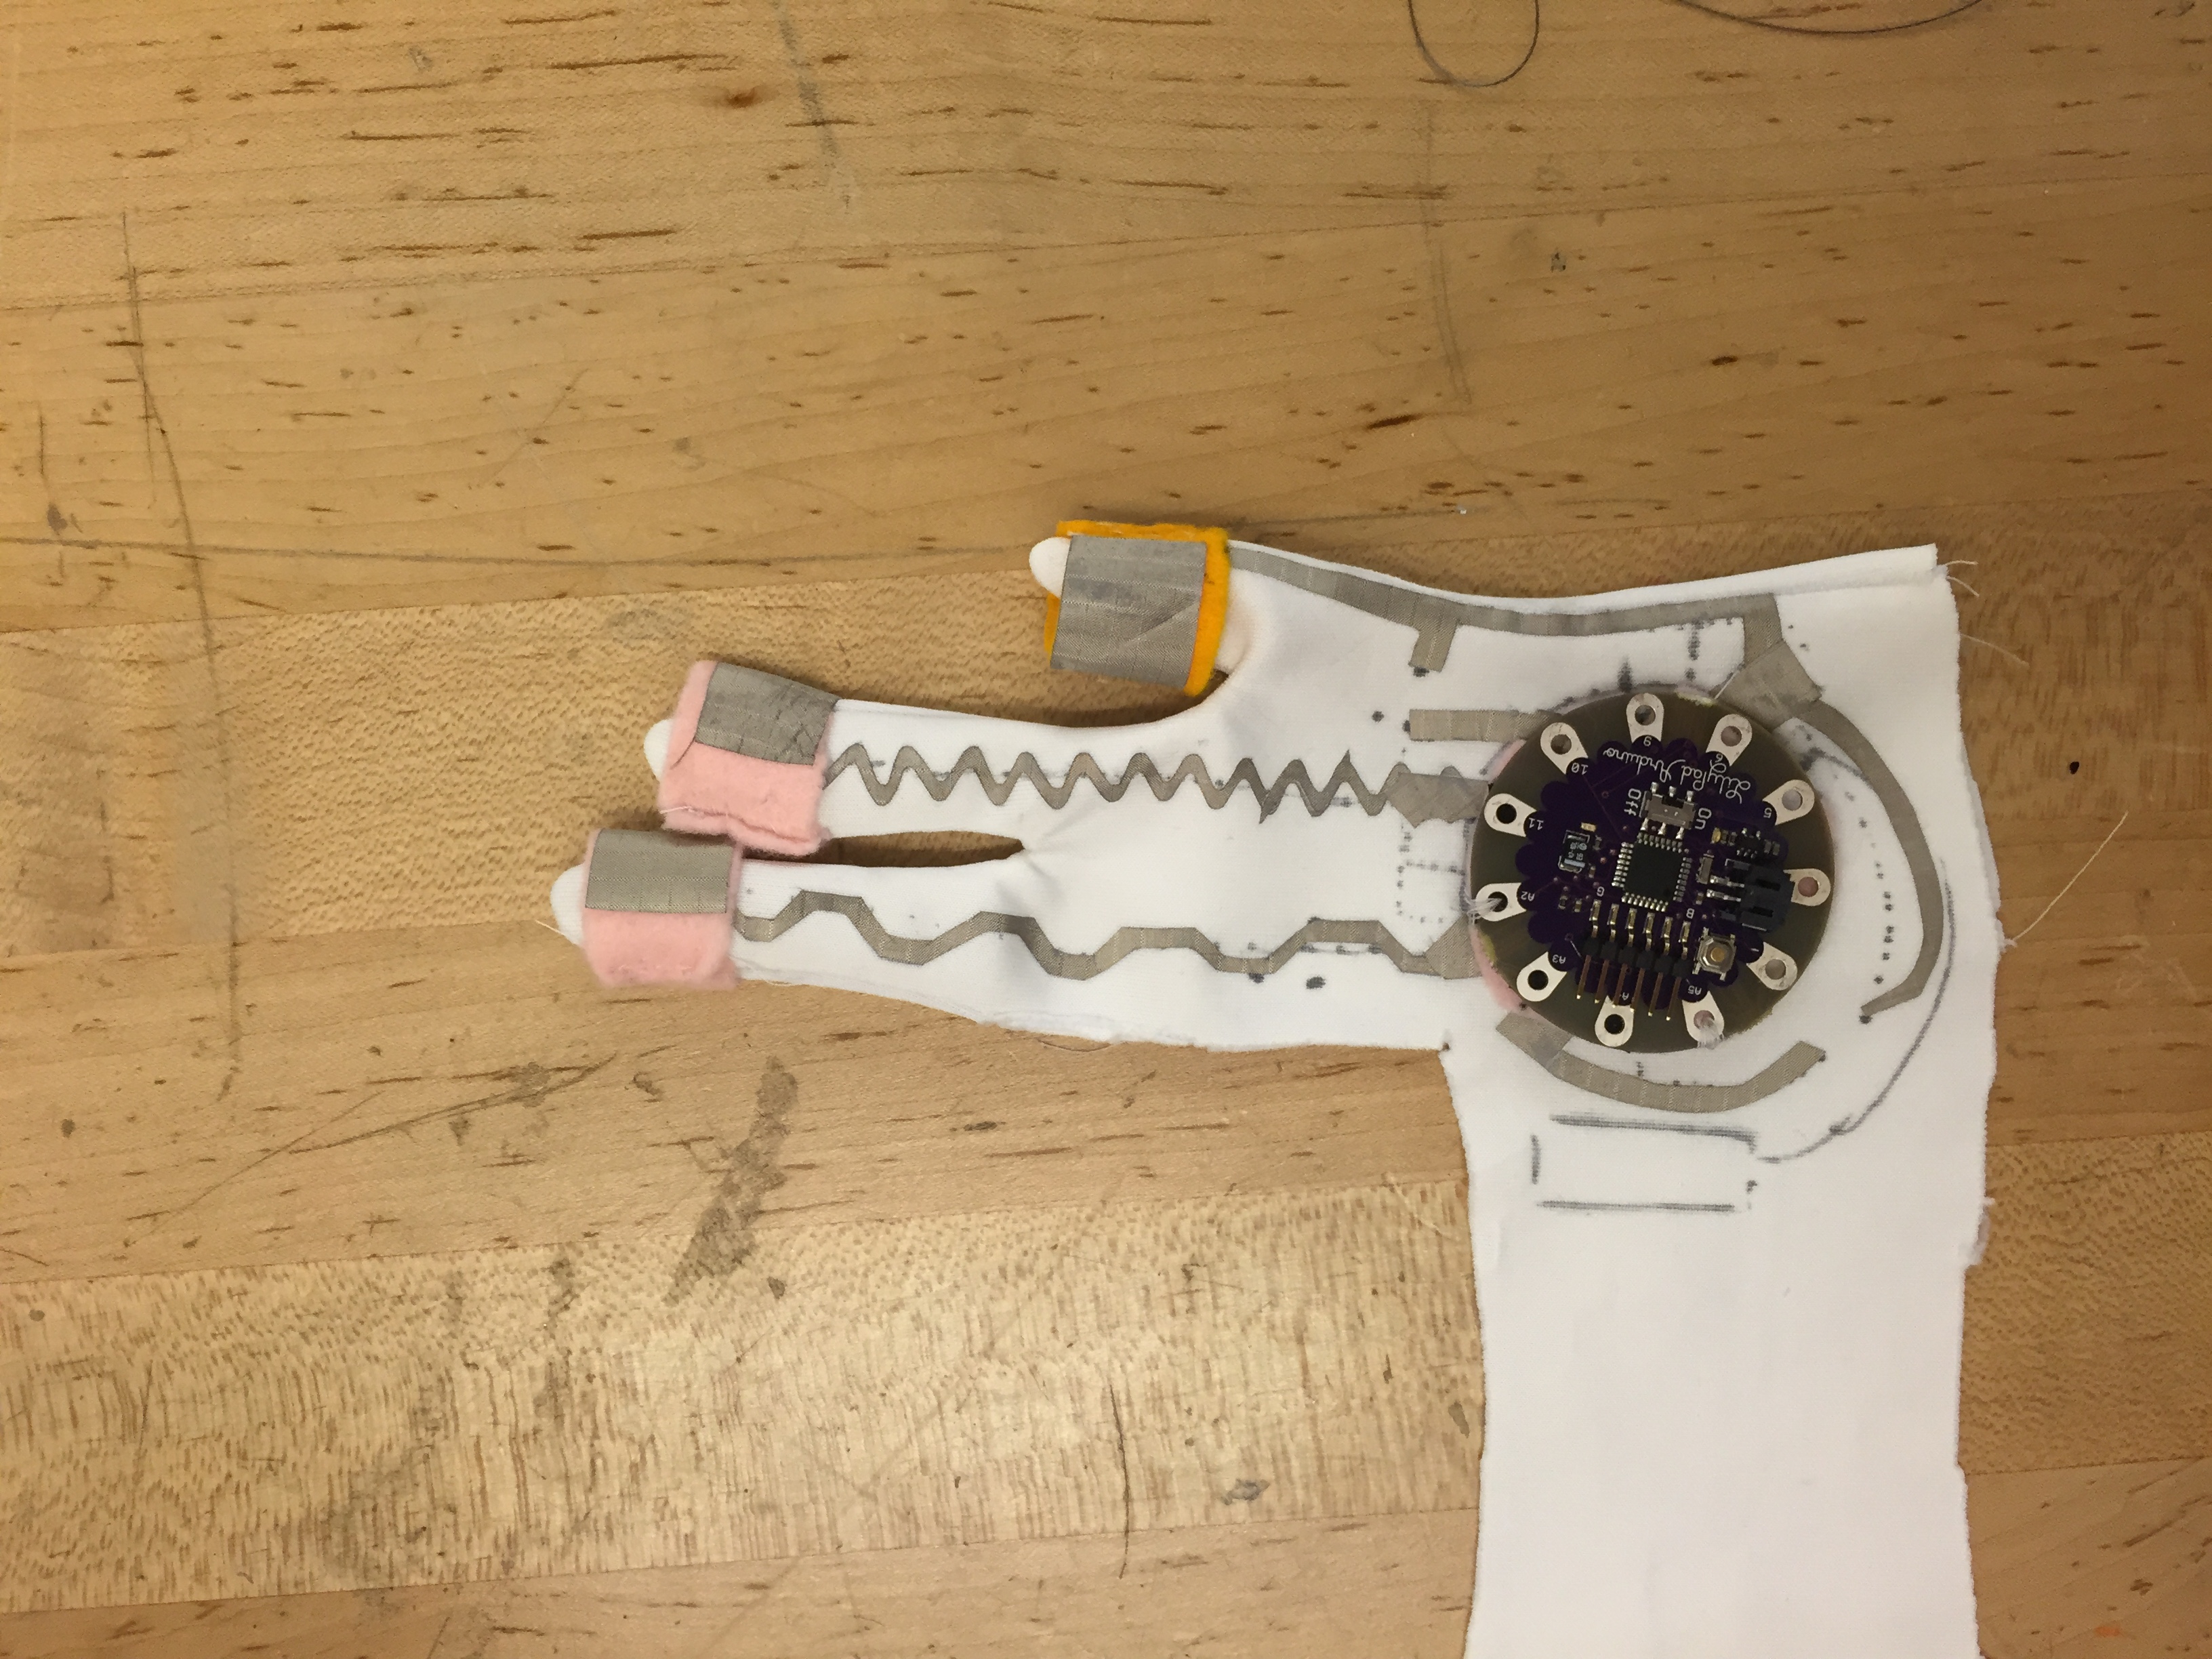
Instructions of the glove: prototype 1
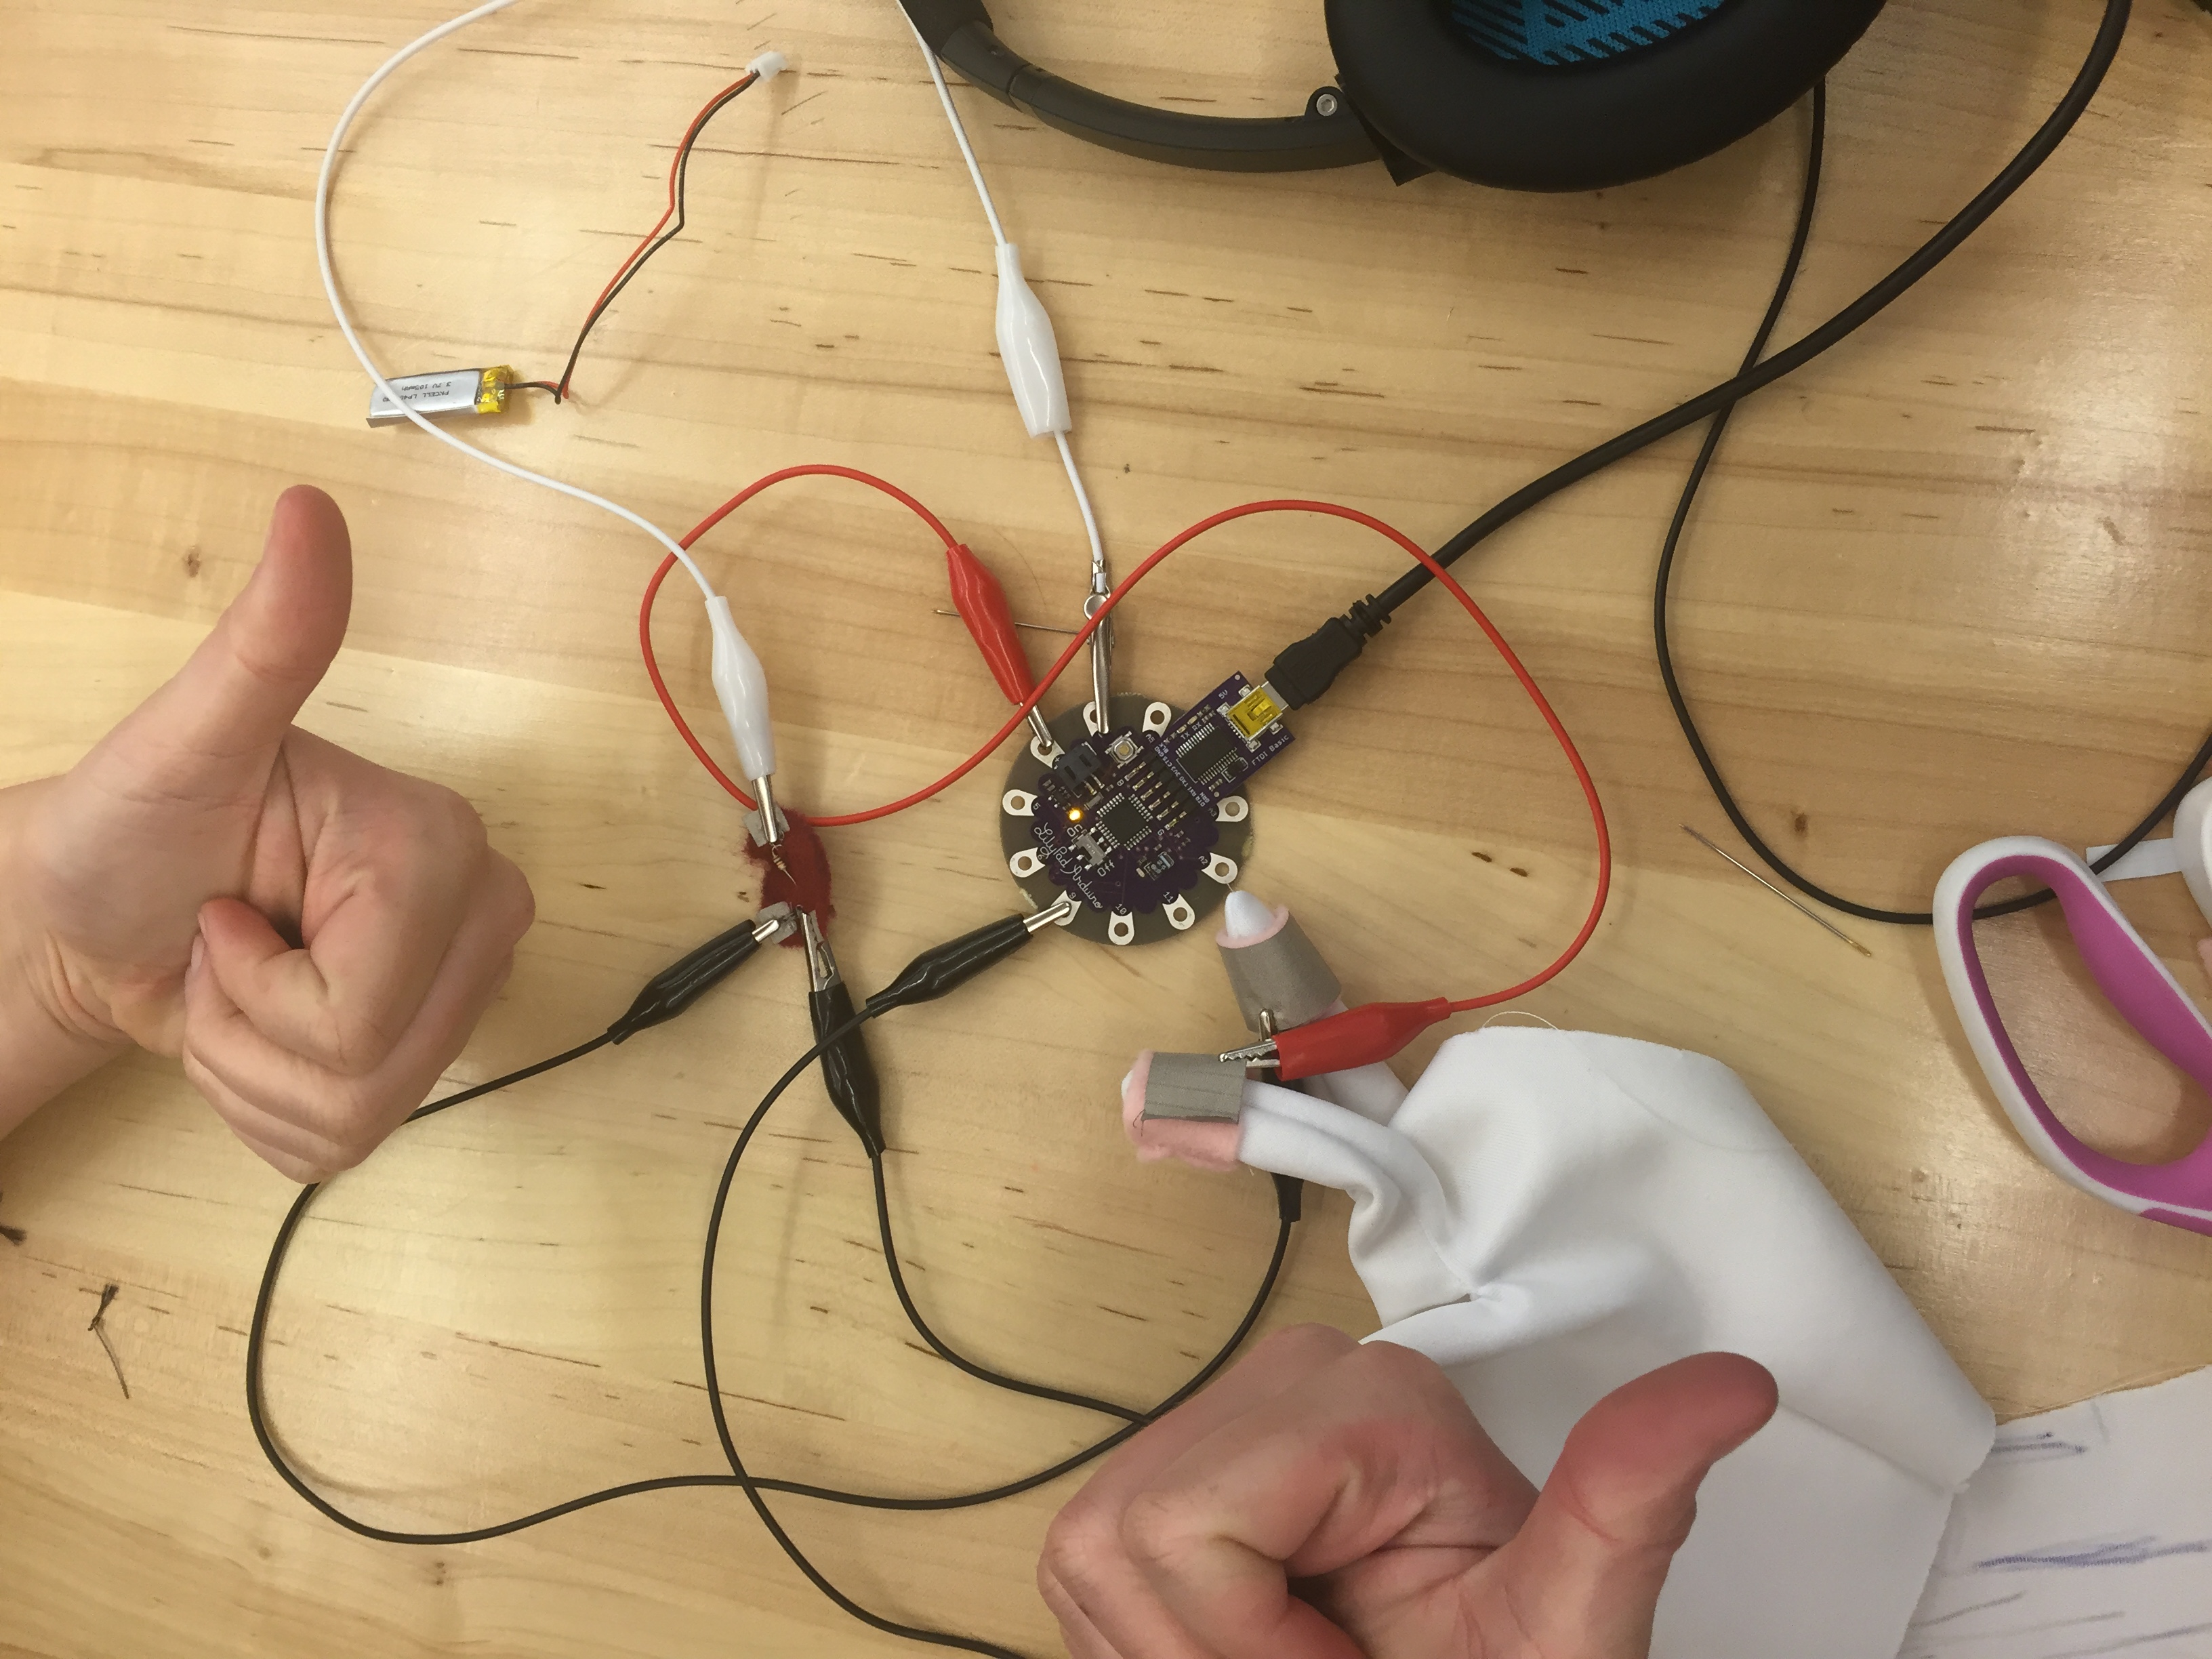

We observed in videos and chats that Sara was able to move her thumb, index and middle finger more than other fingers. and for our prototype #1, we wanted to find out if Sara would be able to touch her thumb and fingers together. We attached LED lights for feedback, hoping that it will give us a better understanding of Sara’s range of motion. In the future, the lights will be replaced with sound.
Questions we are looking to get answered:
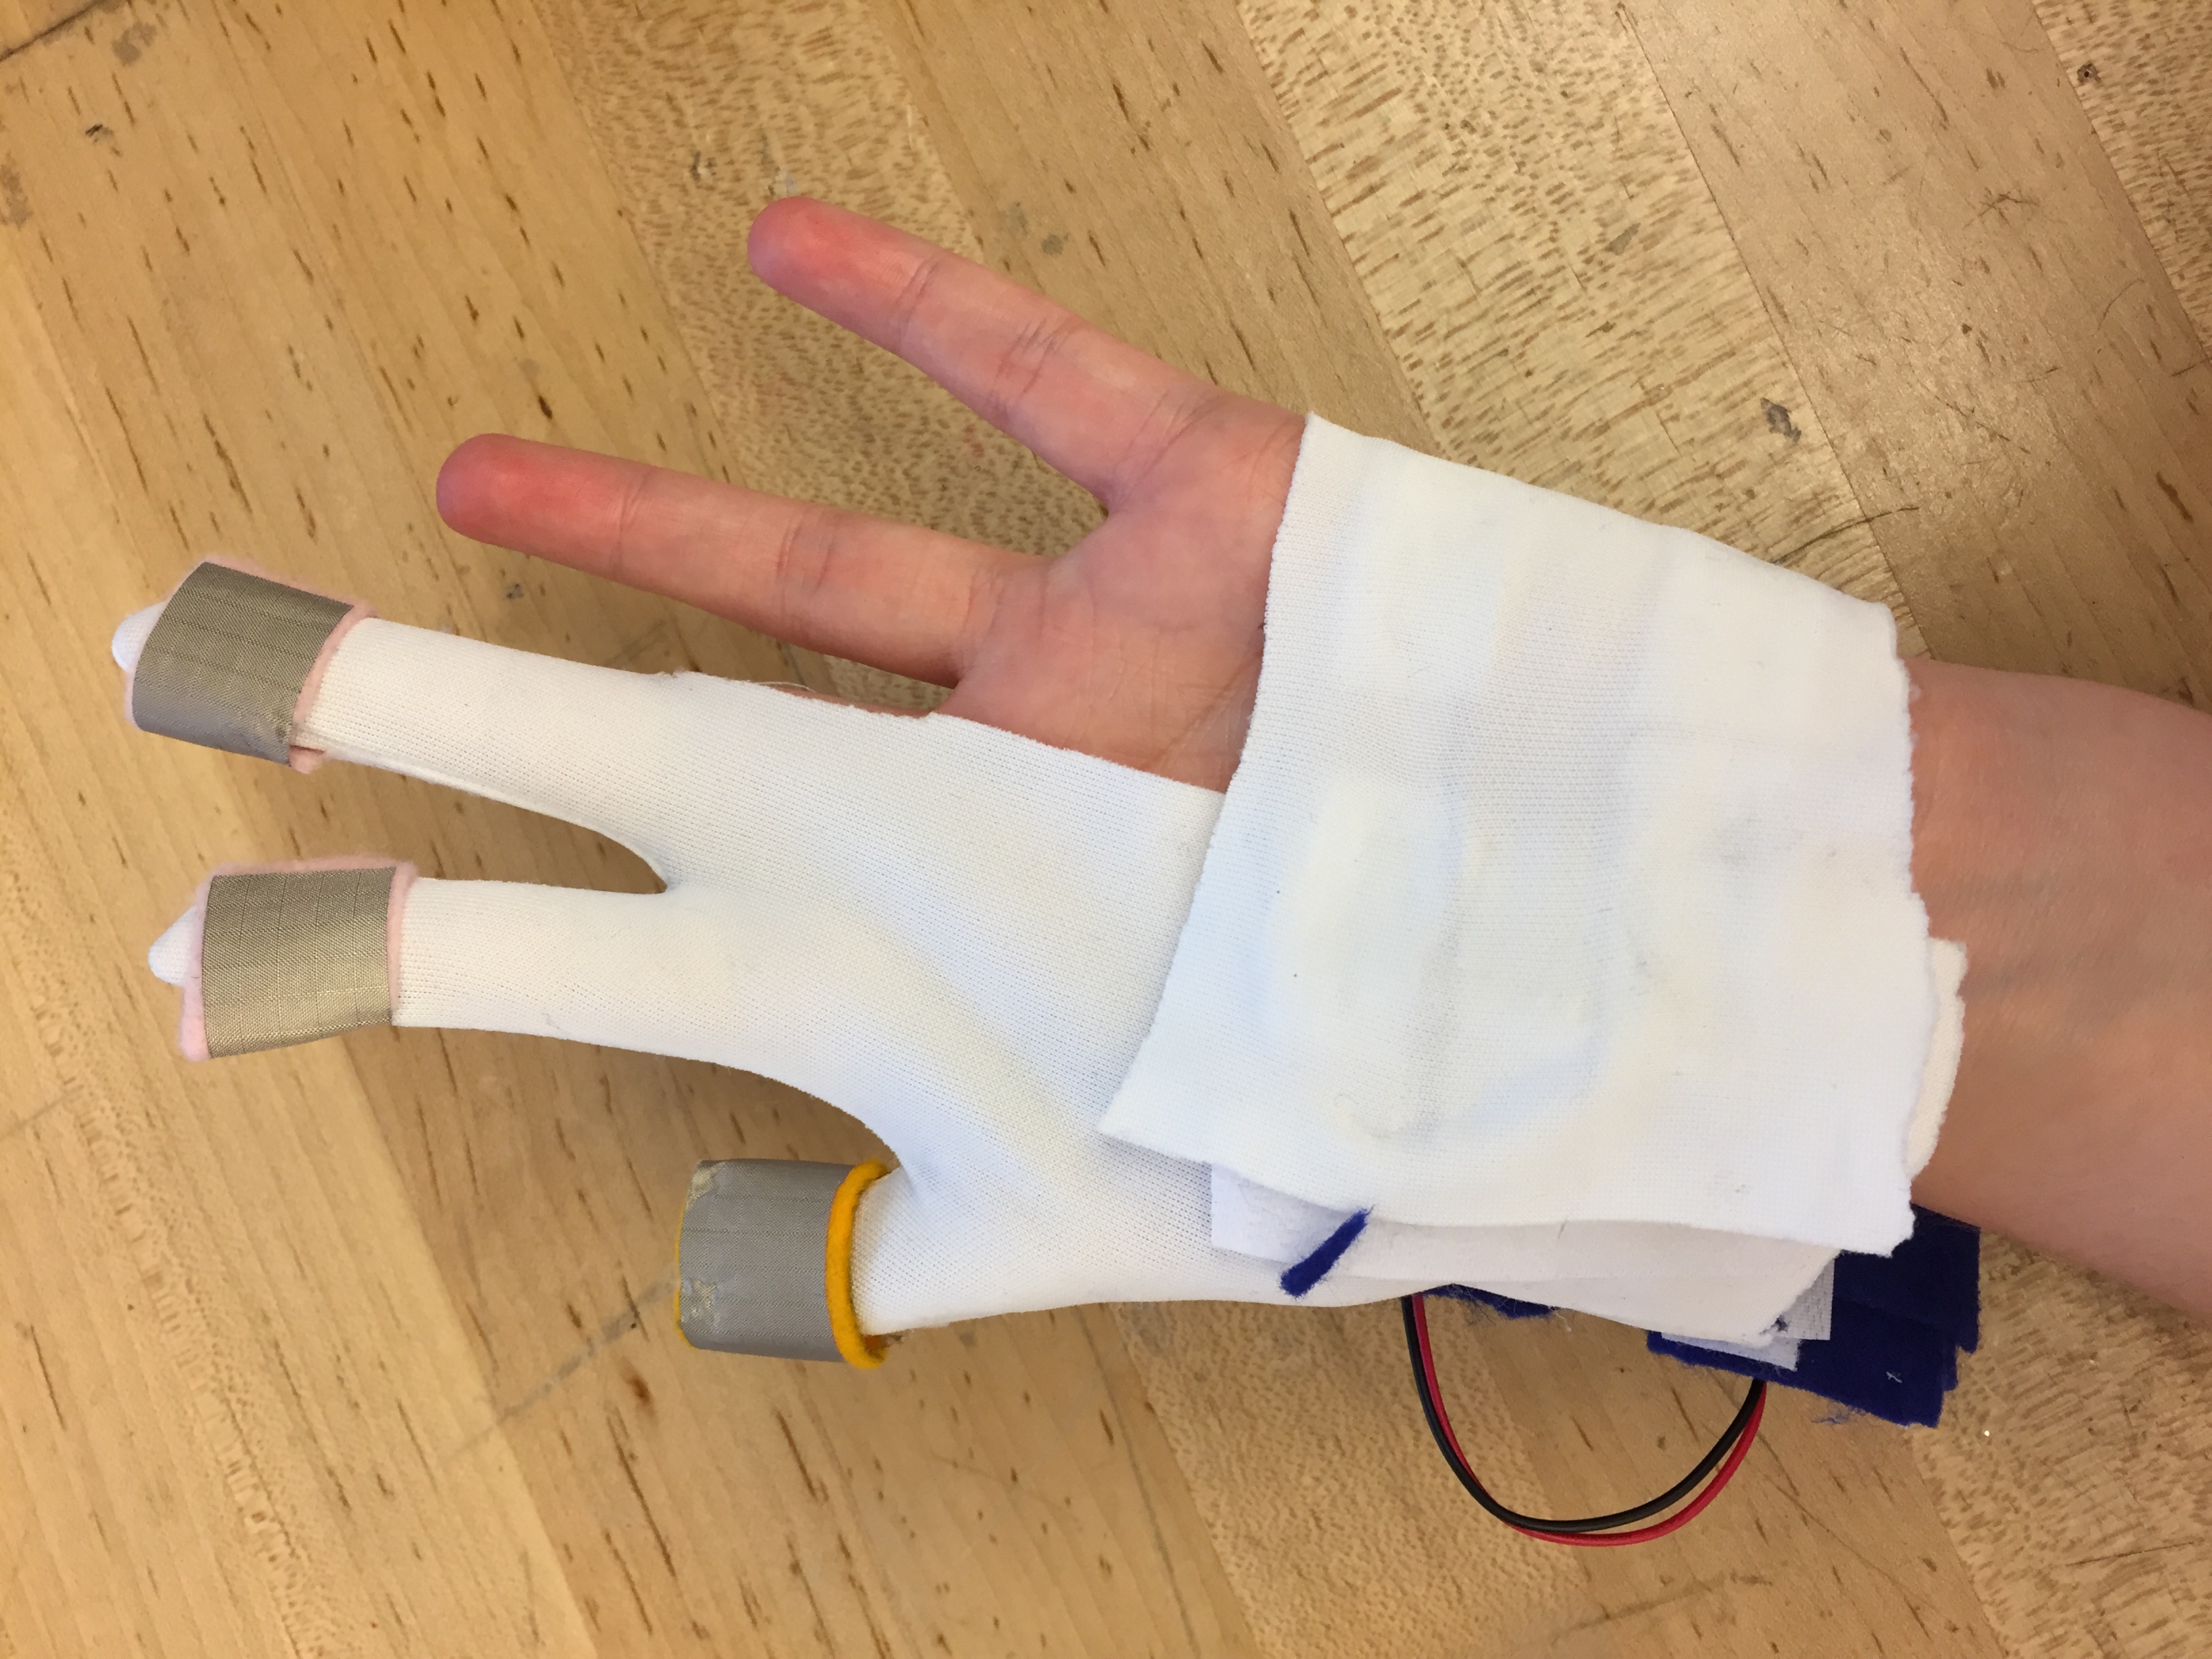
- Does the glove fit, and is it comfortable for Sara to wear? (if not, please tell us how we can improve the glove to make it fit her hand better)
- If Sara is not able to reach the end of her index or middle fingers, is there another place on her hand that would be more comfortable for her?
- How does the battery pack fit on her wrist? Is there another place on her hand that might be better suited?
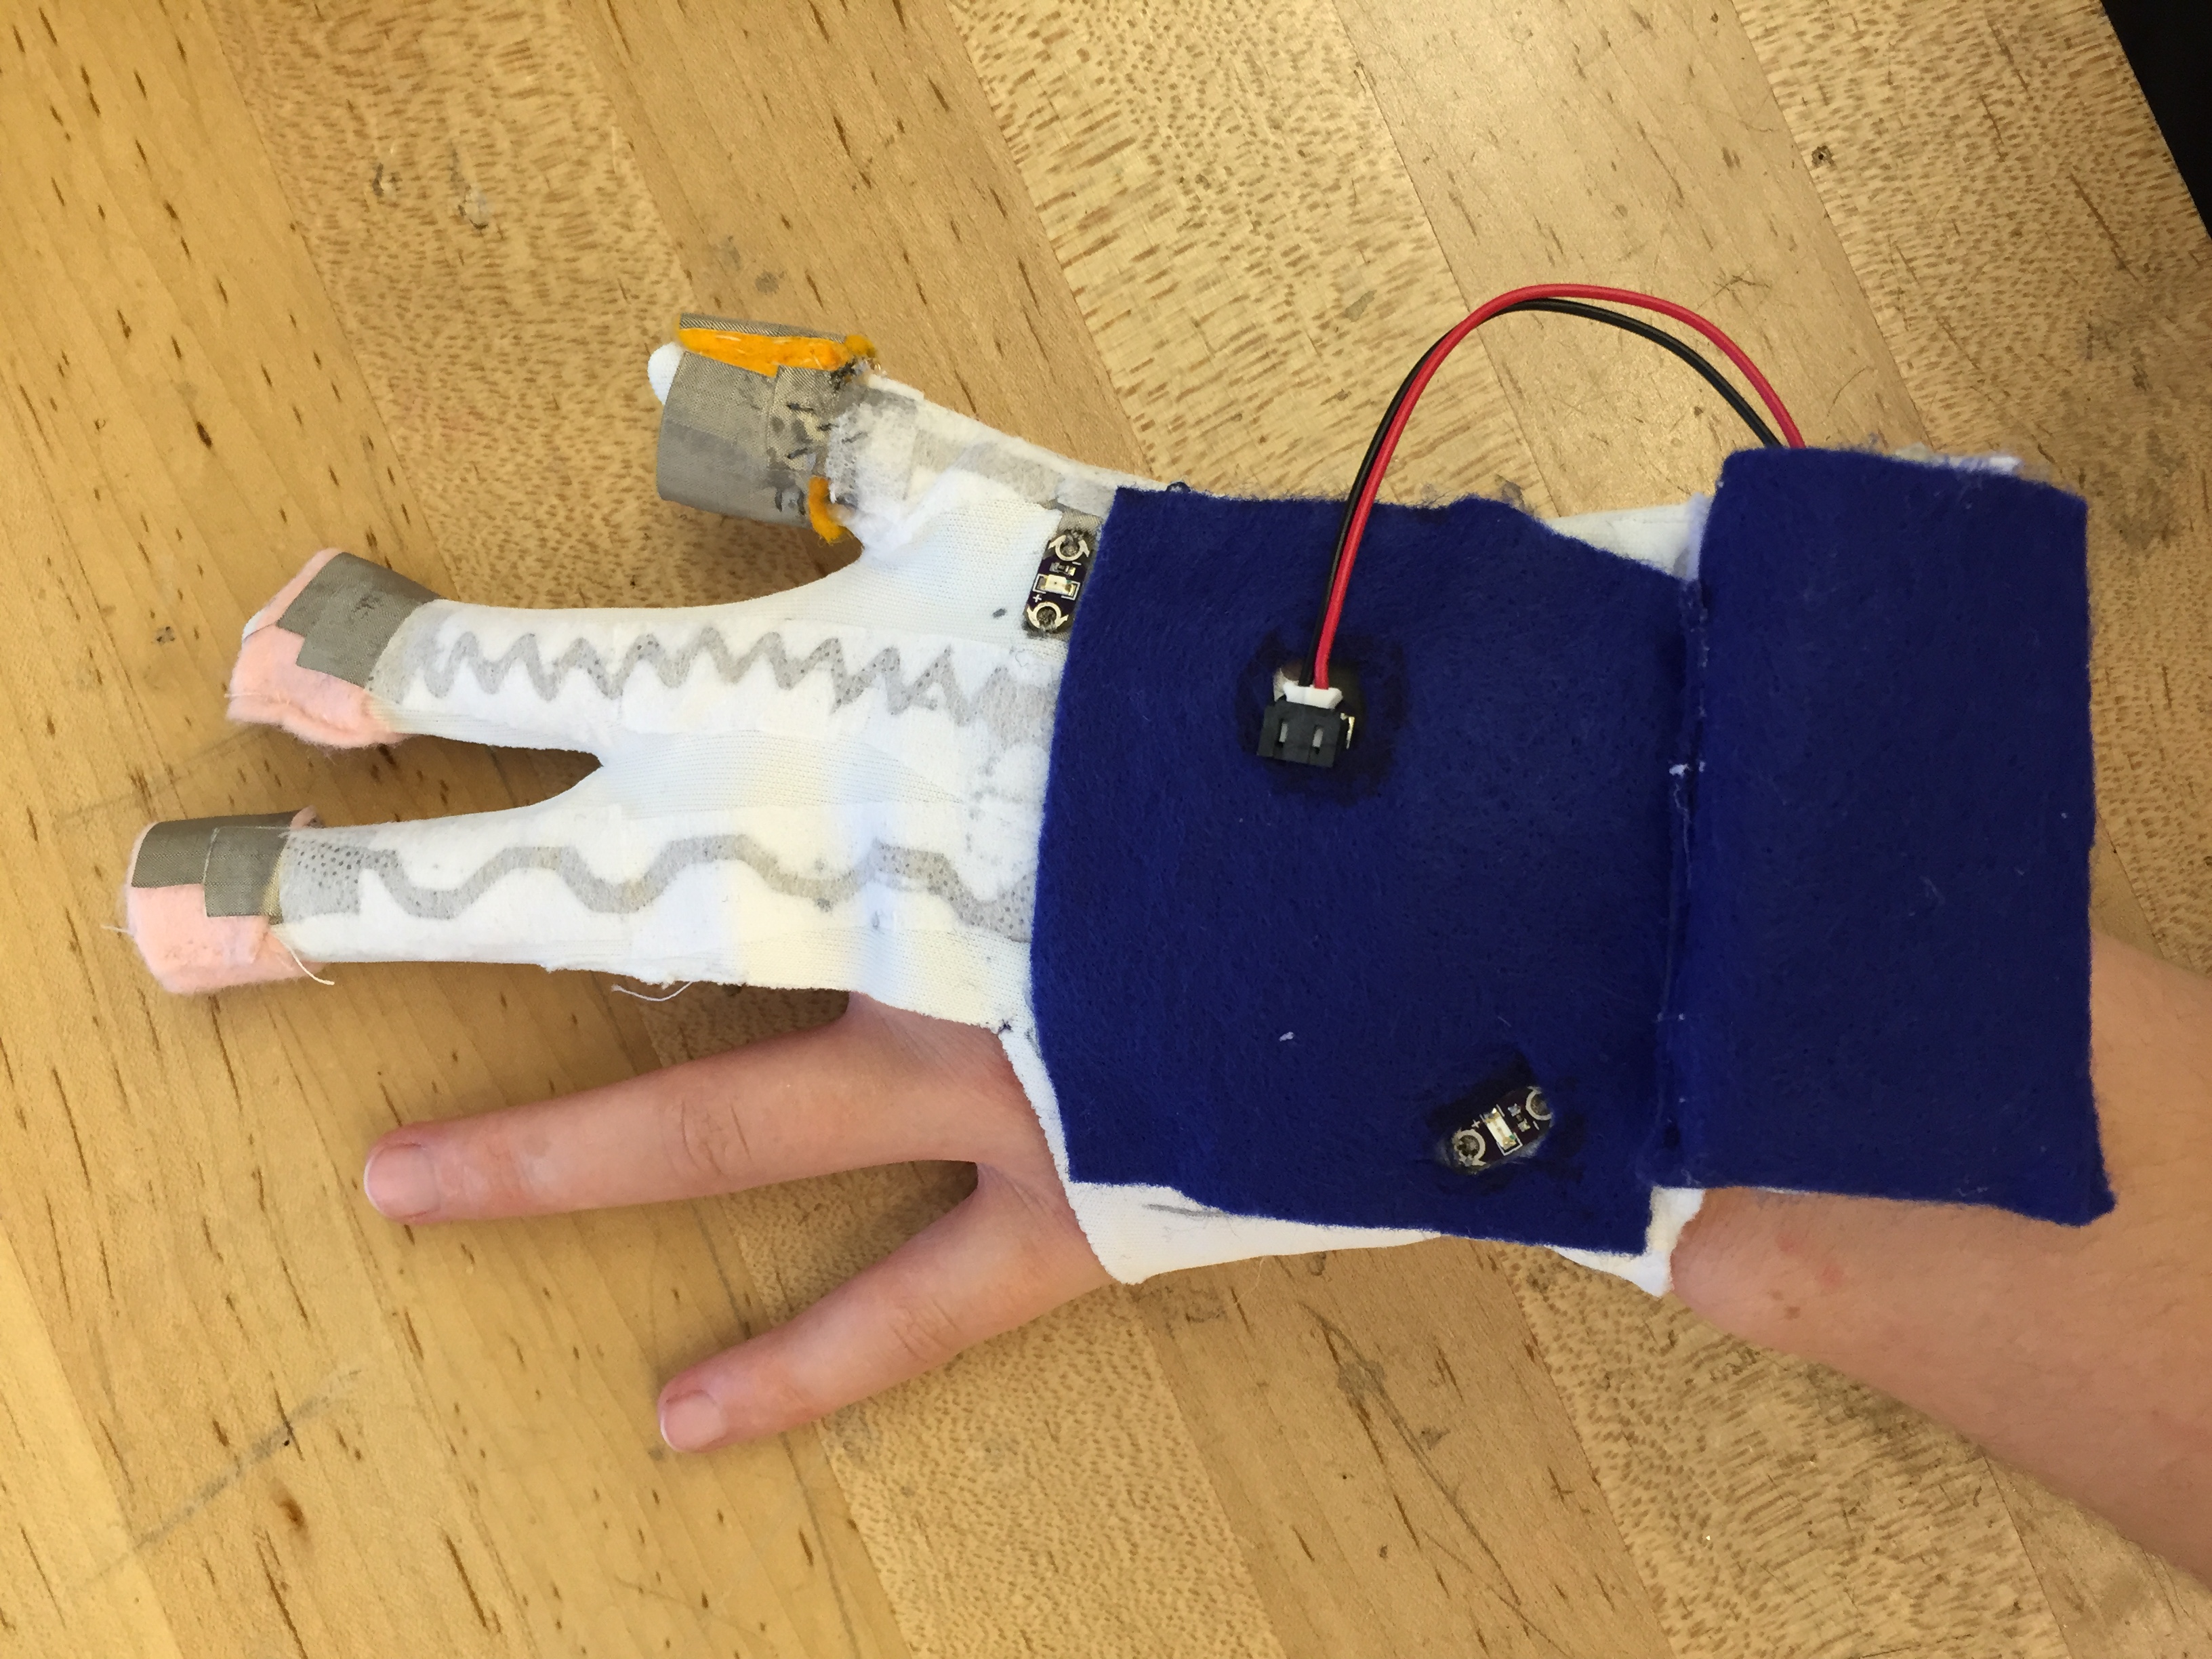
front back
- Making a simple switch:
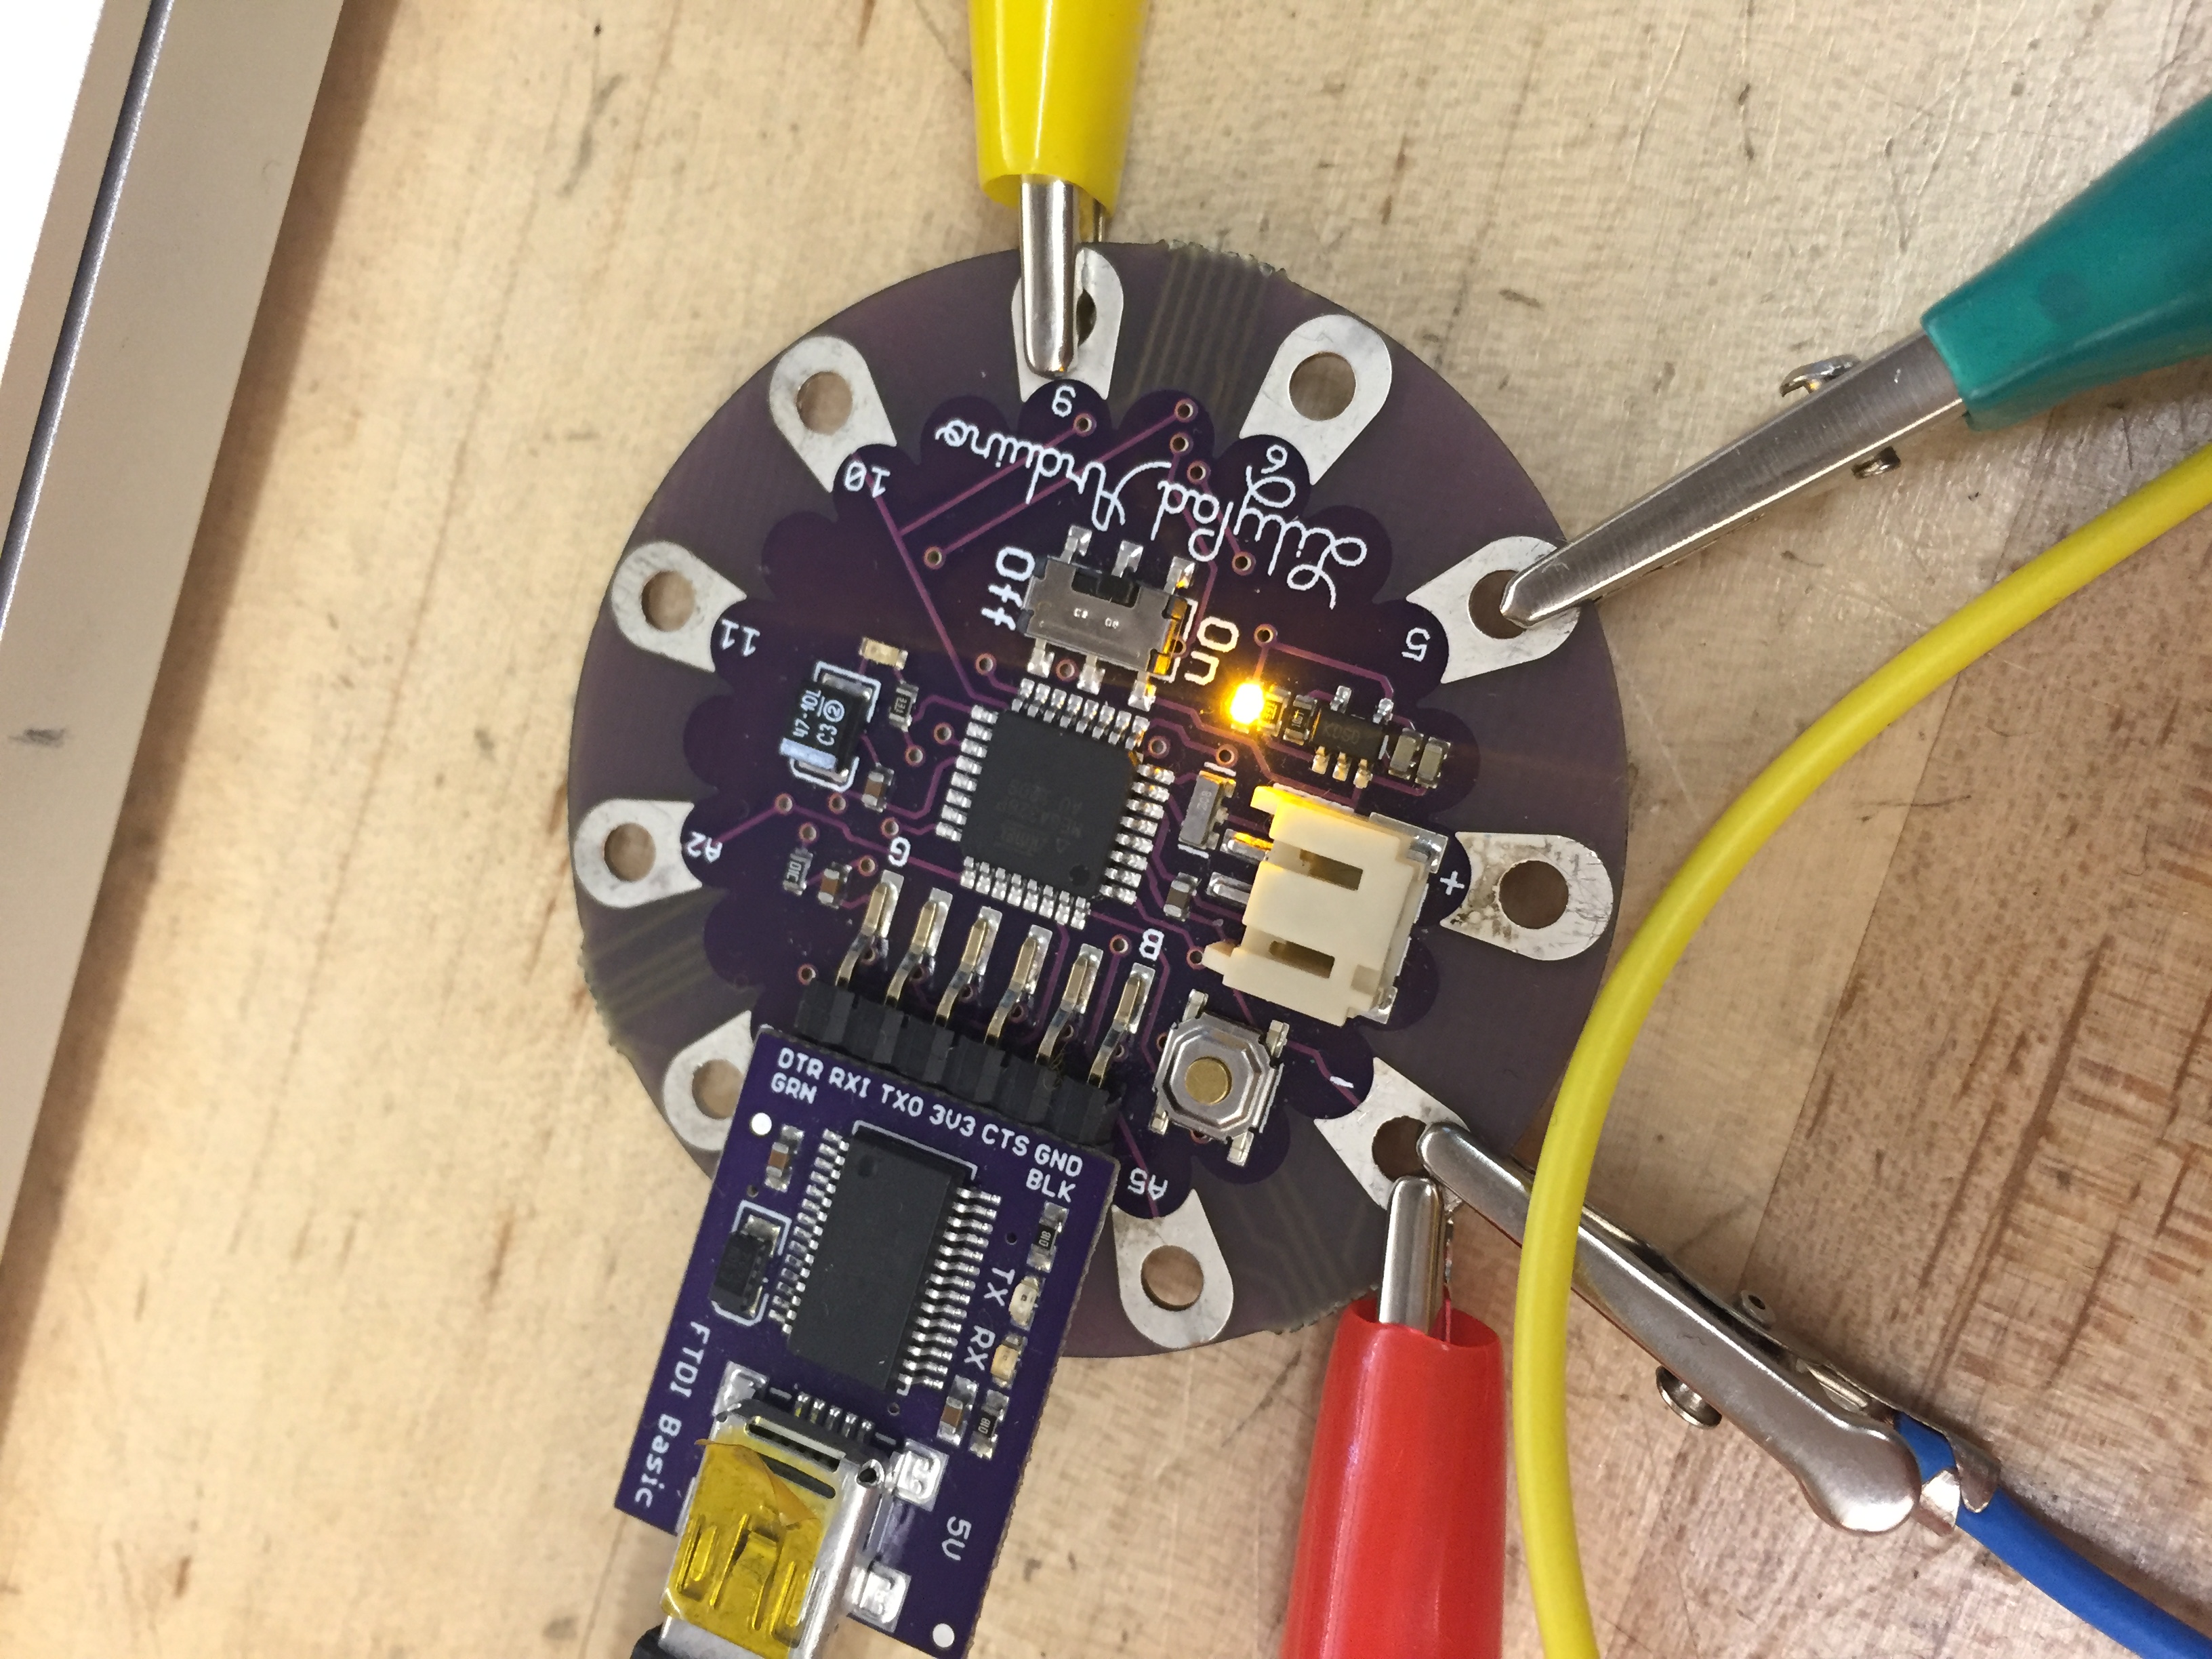
- HIGH FIVE SWITCH:
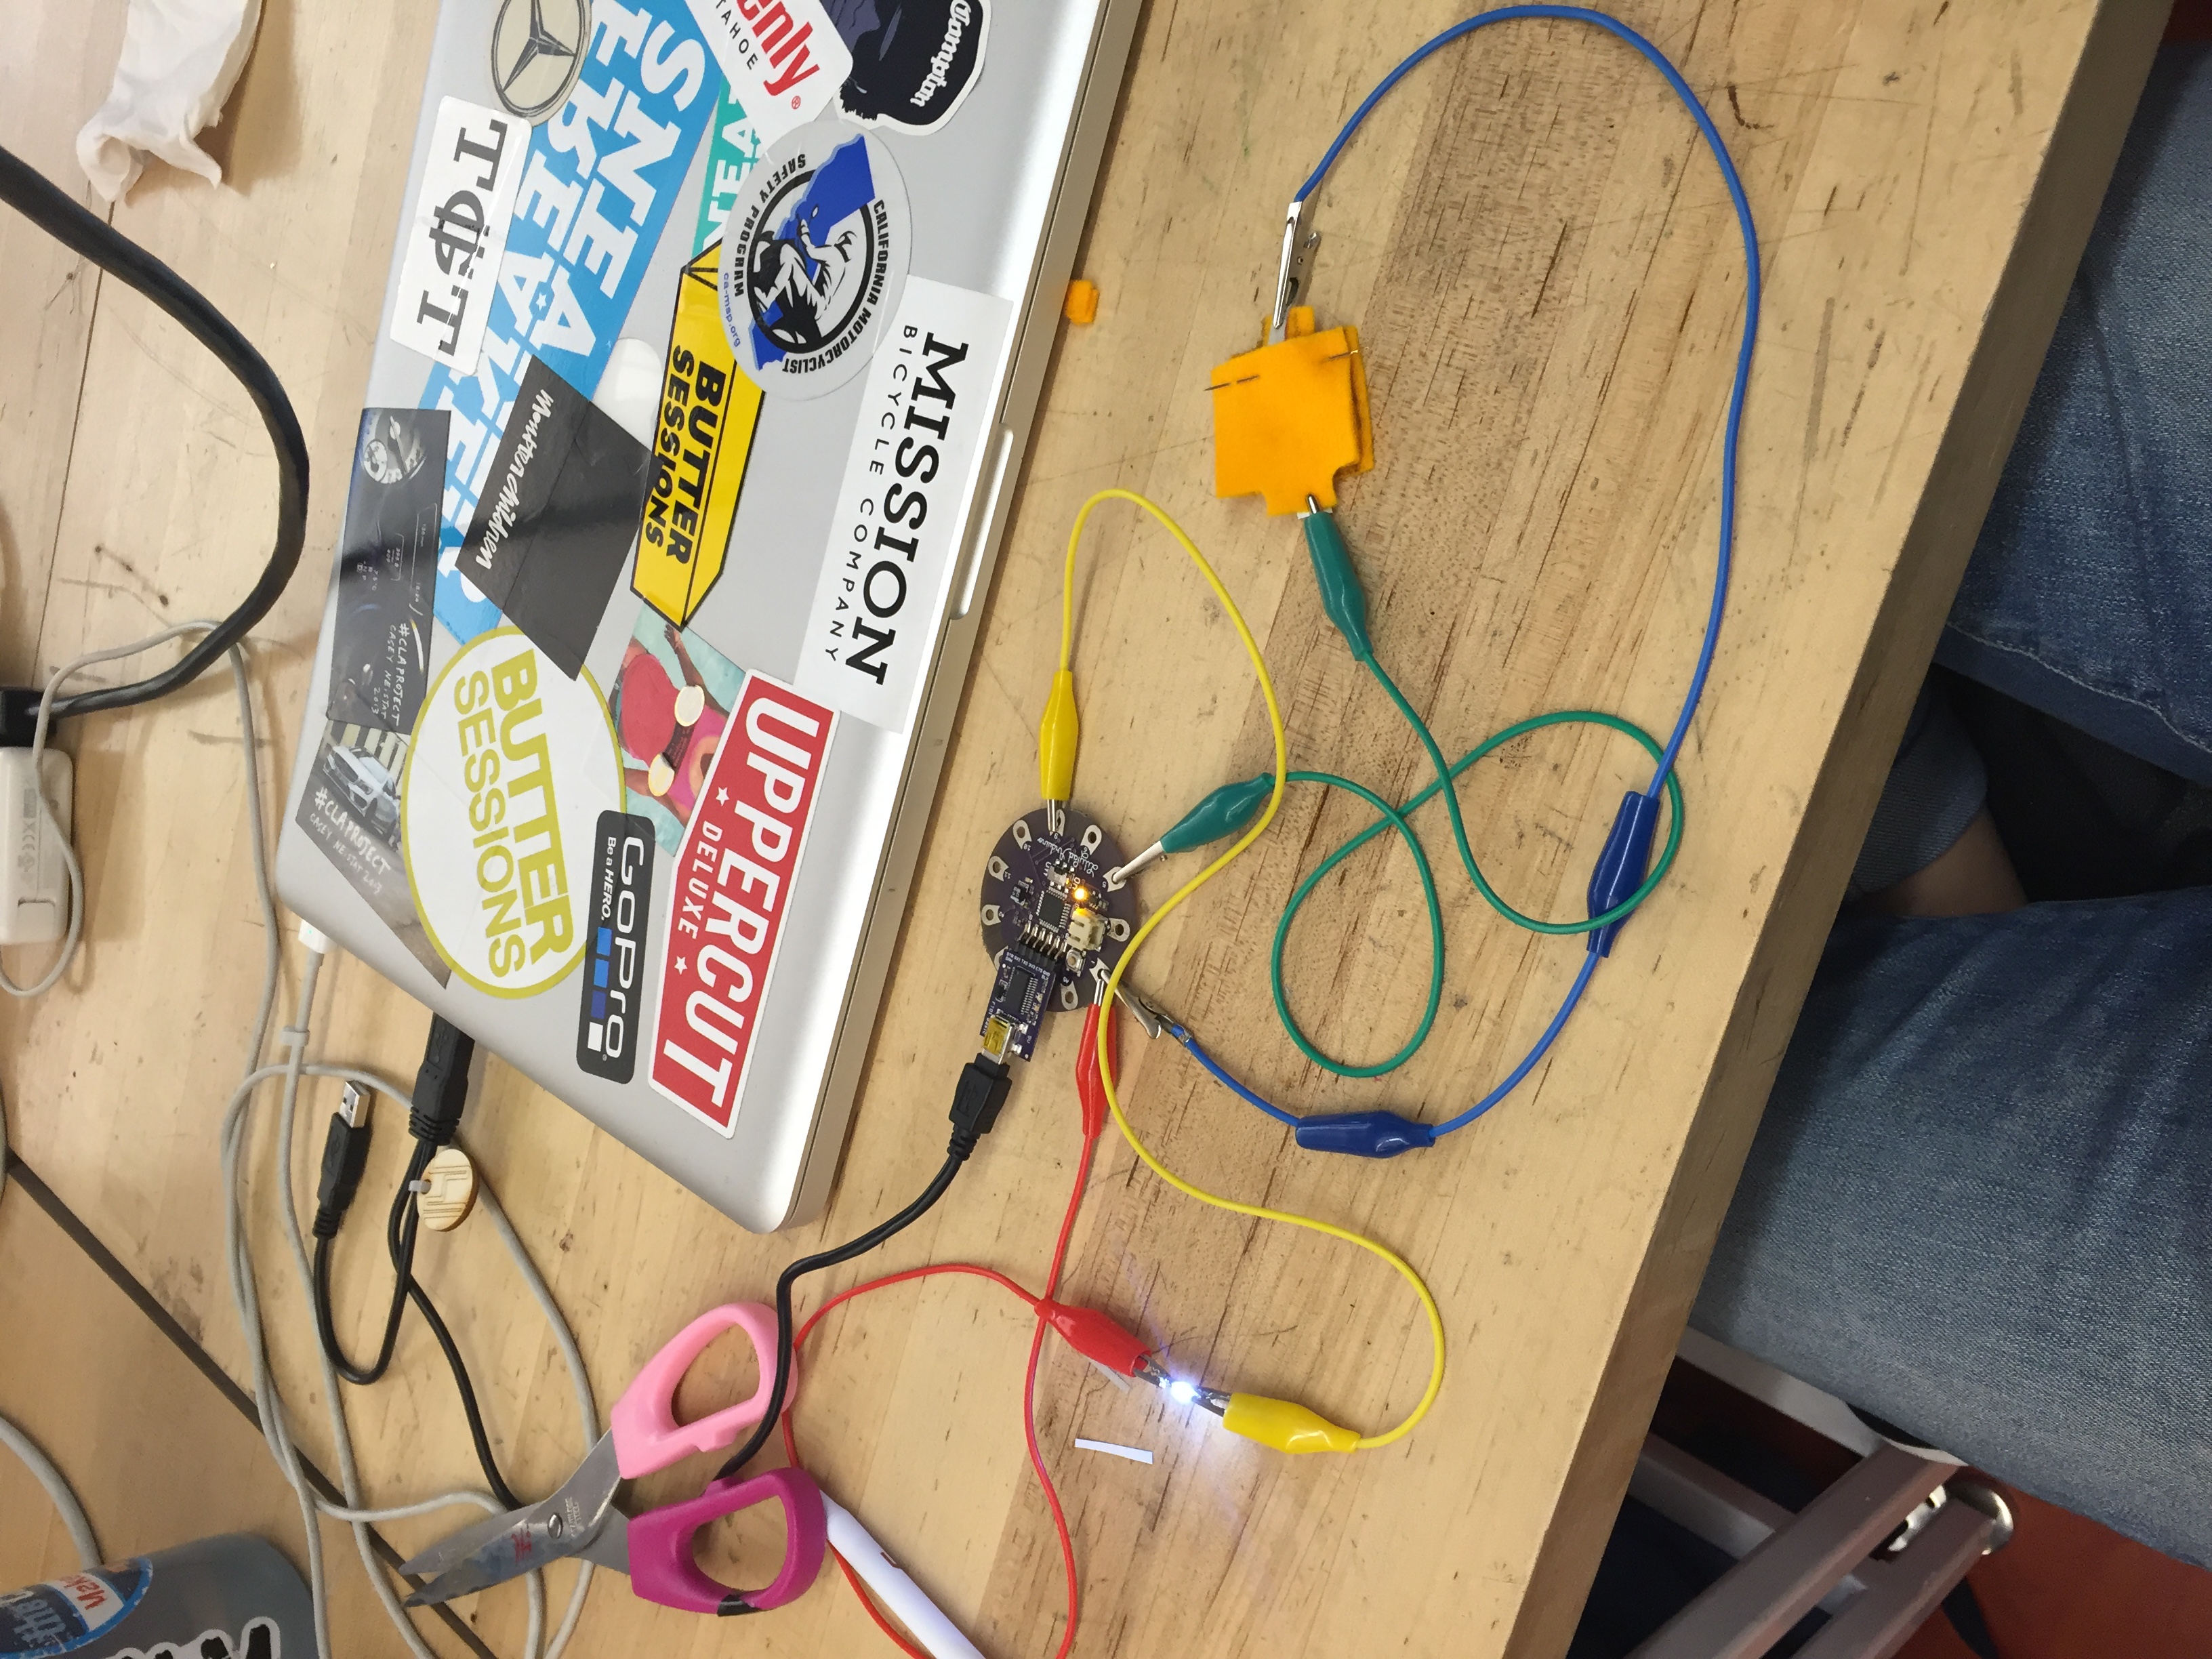
Making of the high-five switch
First started by deciding where the switch is going to be located on the hand. I decided to put mine across the middle of my palm as it is the area where it gets the most contact during high-five action.
Then I cut out the two contacts out of conductive fabric in the shape of long rectangle with little tabs on one side for alligator clips.
One contact was ironed on a strip of felt fabric, (band) that goes around the palm and the other was ironed on a piece of felt fabric.
Spacer was made out in the size of the band (strip of felt), and made a hole in the middle. I made sure to cut it in size that would cover up the whole conductive fabrics on both sides.
Connected the contacts to alligator clips on both ends.
Sandwiched the spacer between the band and the piece of fabric that has one contact ironed on.
Sewed them together to secure them in place
Used the multimeter to test the switch, and it made a beep sound!
Moved on to coding with the pull up and pull down resistor
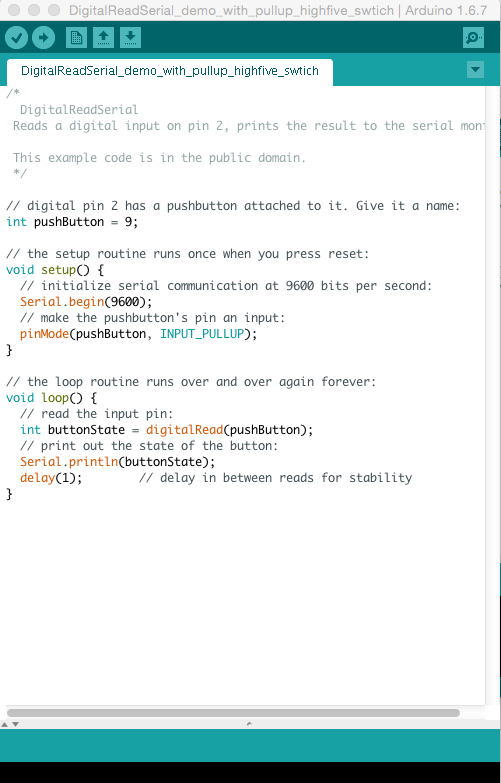
end result: the light turned on when the switch was activated
great success!