Key : 🔹 discussion 🔸 lecture ⚡ demo/activity 🍕 lunch
🔹Introductions
- class structure
- website
- expectations
🔸Brief History of Wearable Technology
🔹 Materials and Tools
- Hybrid Lab tools, materials, and resources
⚡ How to Sew: Using Conductive and Neutral Thread
Hand
- running stitch
- back stitch
- finishing
⚡ Exercise: Intro to Electronics
Using conductive thread, create an LED circuit.
- what is a circuit?
- introduction to electricity, circuit components, and troubleshooting
- breadboard
- parallel vs series
- voltage, power, current and resistance
—————————————————————-
What is a Circuit?
We will be building low voltage DC circuits in this class. A circuit it a closed path, one that begins and ends in the same place. In this circuit, that is the battery. Let’s identify what makes up the simplest electronic circuit.
- Source of power – Battery
- A conductive path that allows electrons to flow – Typically wire, but it our case thread and fabric too!
- Load – A device that puts the current to use, drawing a certain amount when activated.
- Resistance – The ability to resist the flow of charge.
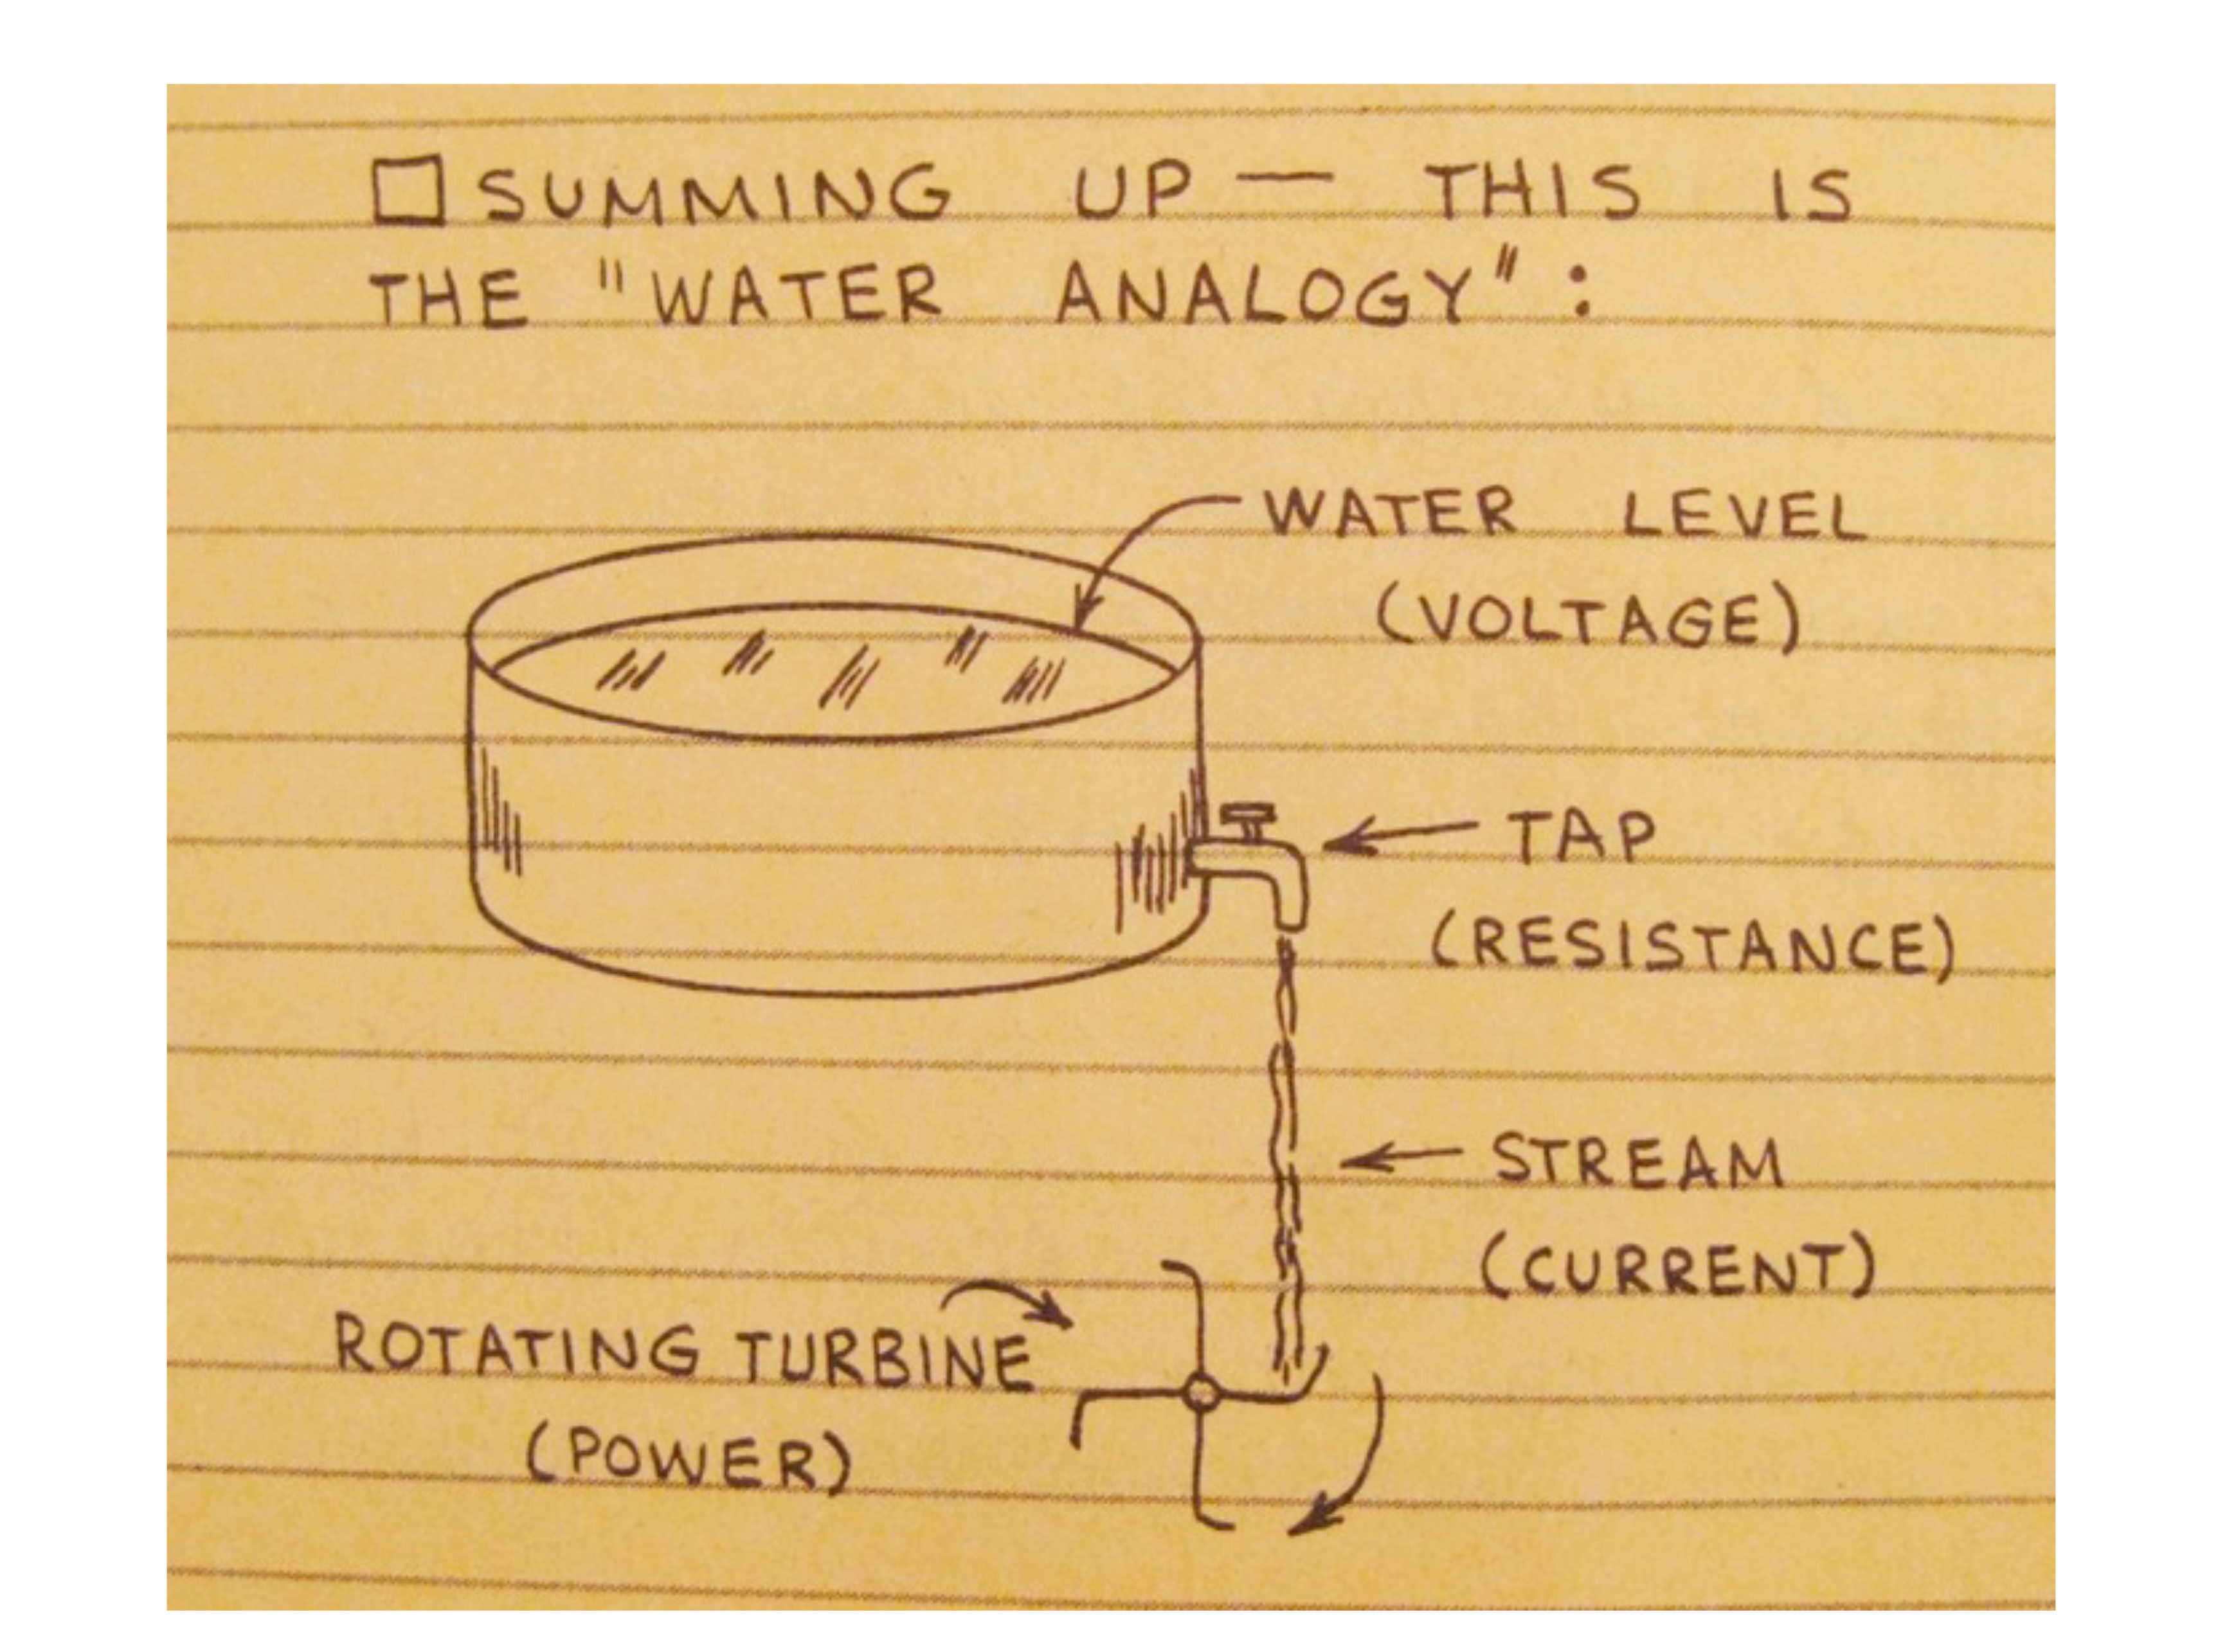
To work with electronic circuits, you should understand how basic electronics work. When electrons are flowing, this produces a charge, which we use to run devices. Voltage is the difference in charge between two points, like the two sides of a battery, power and ground. Current is the flow of an electric charge and how many electrons are passing through one point. How many electrons, or how much current is flowing through the circuit can be restricted, this is called resistance. Different materials have different levels of resistance, in circuit building we use resistors, they are made of carbon and come in many different levels of resistance. You can measure voltage, current and resistance in units:
Voltage – Volts, V
Resistance – Ohms or the ohm symbol Ω
Current – Amperage, Amps, A
These units of measurement are important to be aware of when building your circuit. For each component, there is a voltage and current rating that is it’s maximum. If gone above the max, the device will be damaged. Each component uses up a certain amount of current, which adds up and if not paid attention to, will drain the battery or not allow the current to get to other parts of the circuit. The voltage that a component is rated for is how much it is going to need to operate and is called forward voltage. For example, if an LED has a forward voltage of 2V, this means it will drop 2 volts that the battery supplies.
To see how resistance, current and voltage relate to one another, we use something called Ohm’s Law. Let’s see how it can be useful figuring out how much current we need to resist in the simple LED circuit, so it does not burn up. .
Ohm’s Law is made of 3 simple equations that state the relationship between current, voltage and resistance. If you have two of the three variables, you can find out the third. These are the variables that represent each item:
V = voltage
I = current
R = resistance
The three equations:
V = I x R
I = V/R
R = V/I
Let’s put Ohm’s Law to use!
We are trying to figure out the value of the resistor, which is R.
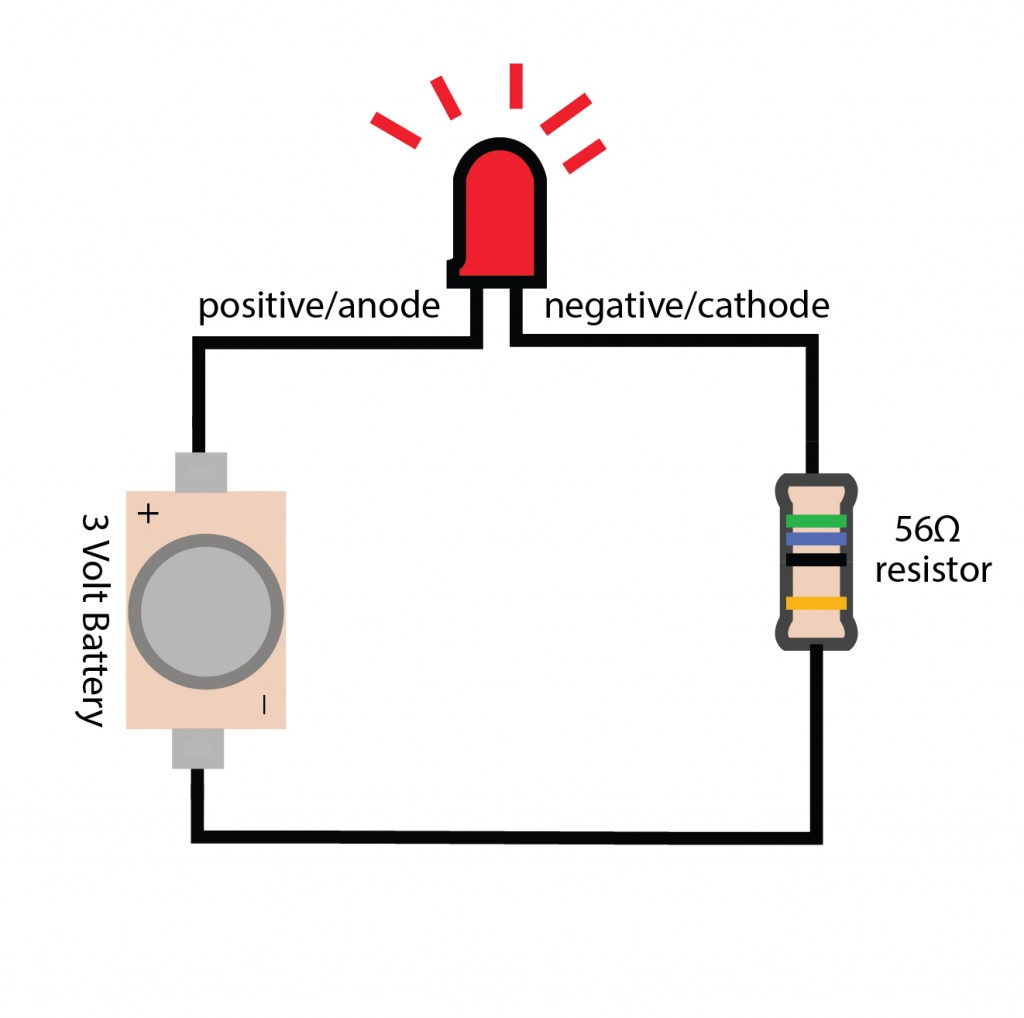
To get R, we need the voltage (V) and current (I) that will be traveling through the resistor. How will we get that? Looking up the voltage and current rating of the LED and knowing what the voltage of the battery is.
So, we look up a datasheet of the red LED we are using, typically the forward voltage is 1.8 – 2.2V, let’s go in the middle and say 2V. We can also find that the red LED will use 20 milliamps (mA). There are 1000 mA in 1 A. In this simple circuit the current will be the same all around, if the LED will be taking, so we estimate that 20 mA will be going across the resistor. To use Ohm’s Law, we need to convert mA to A.
20 mA / 1000 = 0.02 Amps
Minus the voltage the LED will be taking from the what the battery provides.
3 (battery) – 2 (LED forward voltage) = 1
So, we have our two values, all we do now is plug them in the equation to find the resistance.
R = 1/0.02
50 = 1/0.02
There is no 50 Ohm resistor, so we round up to 56 Ohms.
OK! You have now been introduced to some fundamental terms and understanding of how they relate to each other, but we aren’t done yet!
To help build circuits, it’s essential to know two of the simplest ways to connect components in a circuit.
Series and parallel are two ways that come up the most frequent. Knowing how to connect components in series and parallel will tell you how much current and voltage multiple devices can take and enables you to use multiple batteries if you need more current or voltage.
LEDs
In Series
Say you have 4 LEDs that you connect end to end, the positive of one to the negative of the other, continuing down the line. You will end up with one positive and one negative lead, which then gets connected to a power source. Being arranged in series, end-to-end, routes the power through every LED. Traveling through multiple LEDs causes voltage to drop with each one. If it takes 2.2V to power one LED, a 3V will do the trick with one, but with two in series, they will not light up since 2.2V x 2 = 4.4V can be provided. Unlike the voltage value, when LEDs are put in series, the current draw is the same as one LED and is not multiplied.
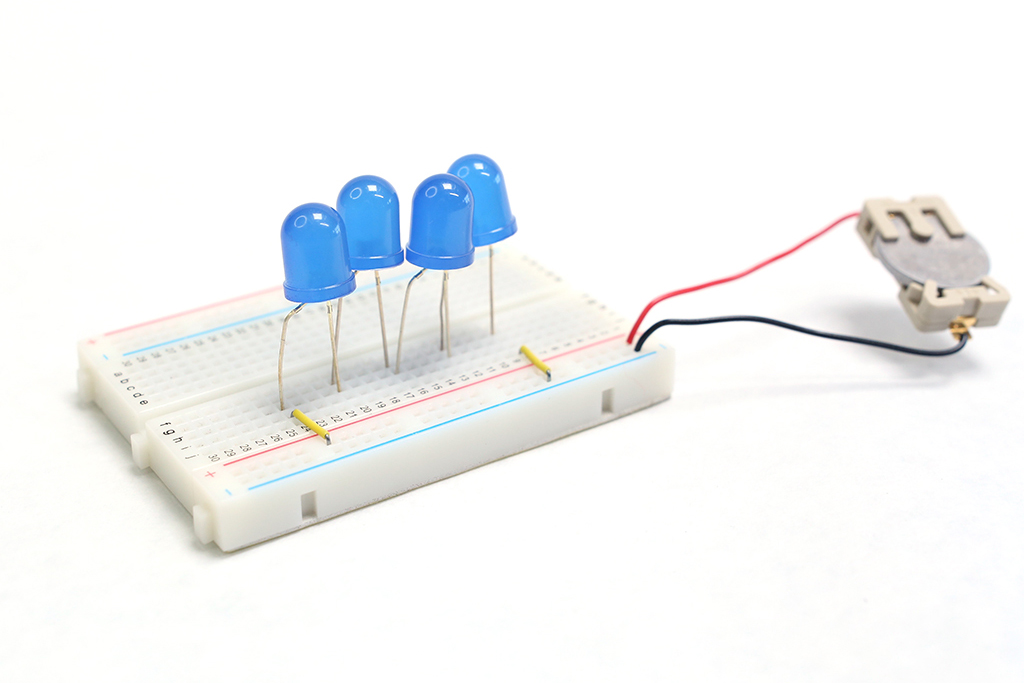
In Parallel
In parallel is in reference to the components orientation to the power bus. When connected in parallel, all the LED negative terminals run along the negative bus of the battery, and all the positive terminals run along the positive. Running in parallel with each other and sharing the same power buses means that they all receive the same amount of voltage. You can now us a 3V battery to run the four LEDs. While in parallel, the current is the one that gets multiplied this time. The 4 LEDs will take 3V, but drain the battery faster.

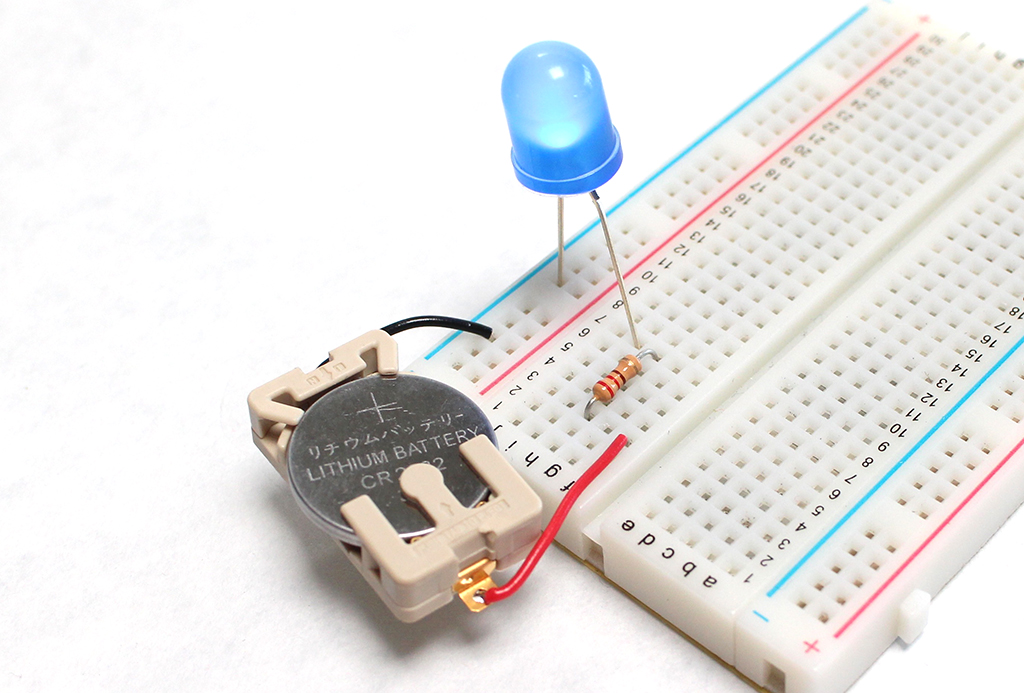
⚡ Build a Simple Circuit
Materials
conductive thread and fabric
hand needle
LED – choose a color
battery
resistor
felt, woven or knit
breadboard
alligator clips
jumper wires
multimeter
Breadboard Circuit
Based on the battery source and color LED you choose, use Ohm’s Law figure out the what value resistor you will need. Find the current and voltage rating for the color and size of the LED you picked.
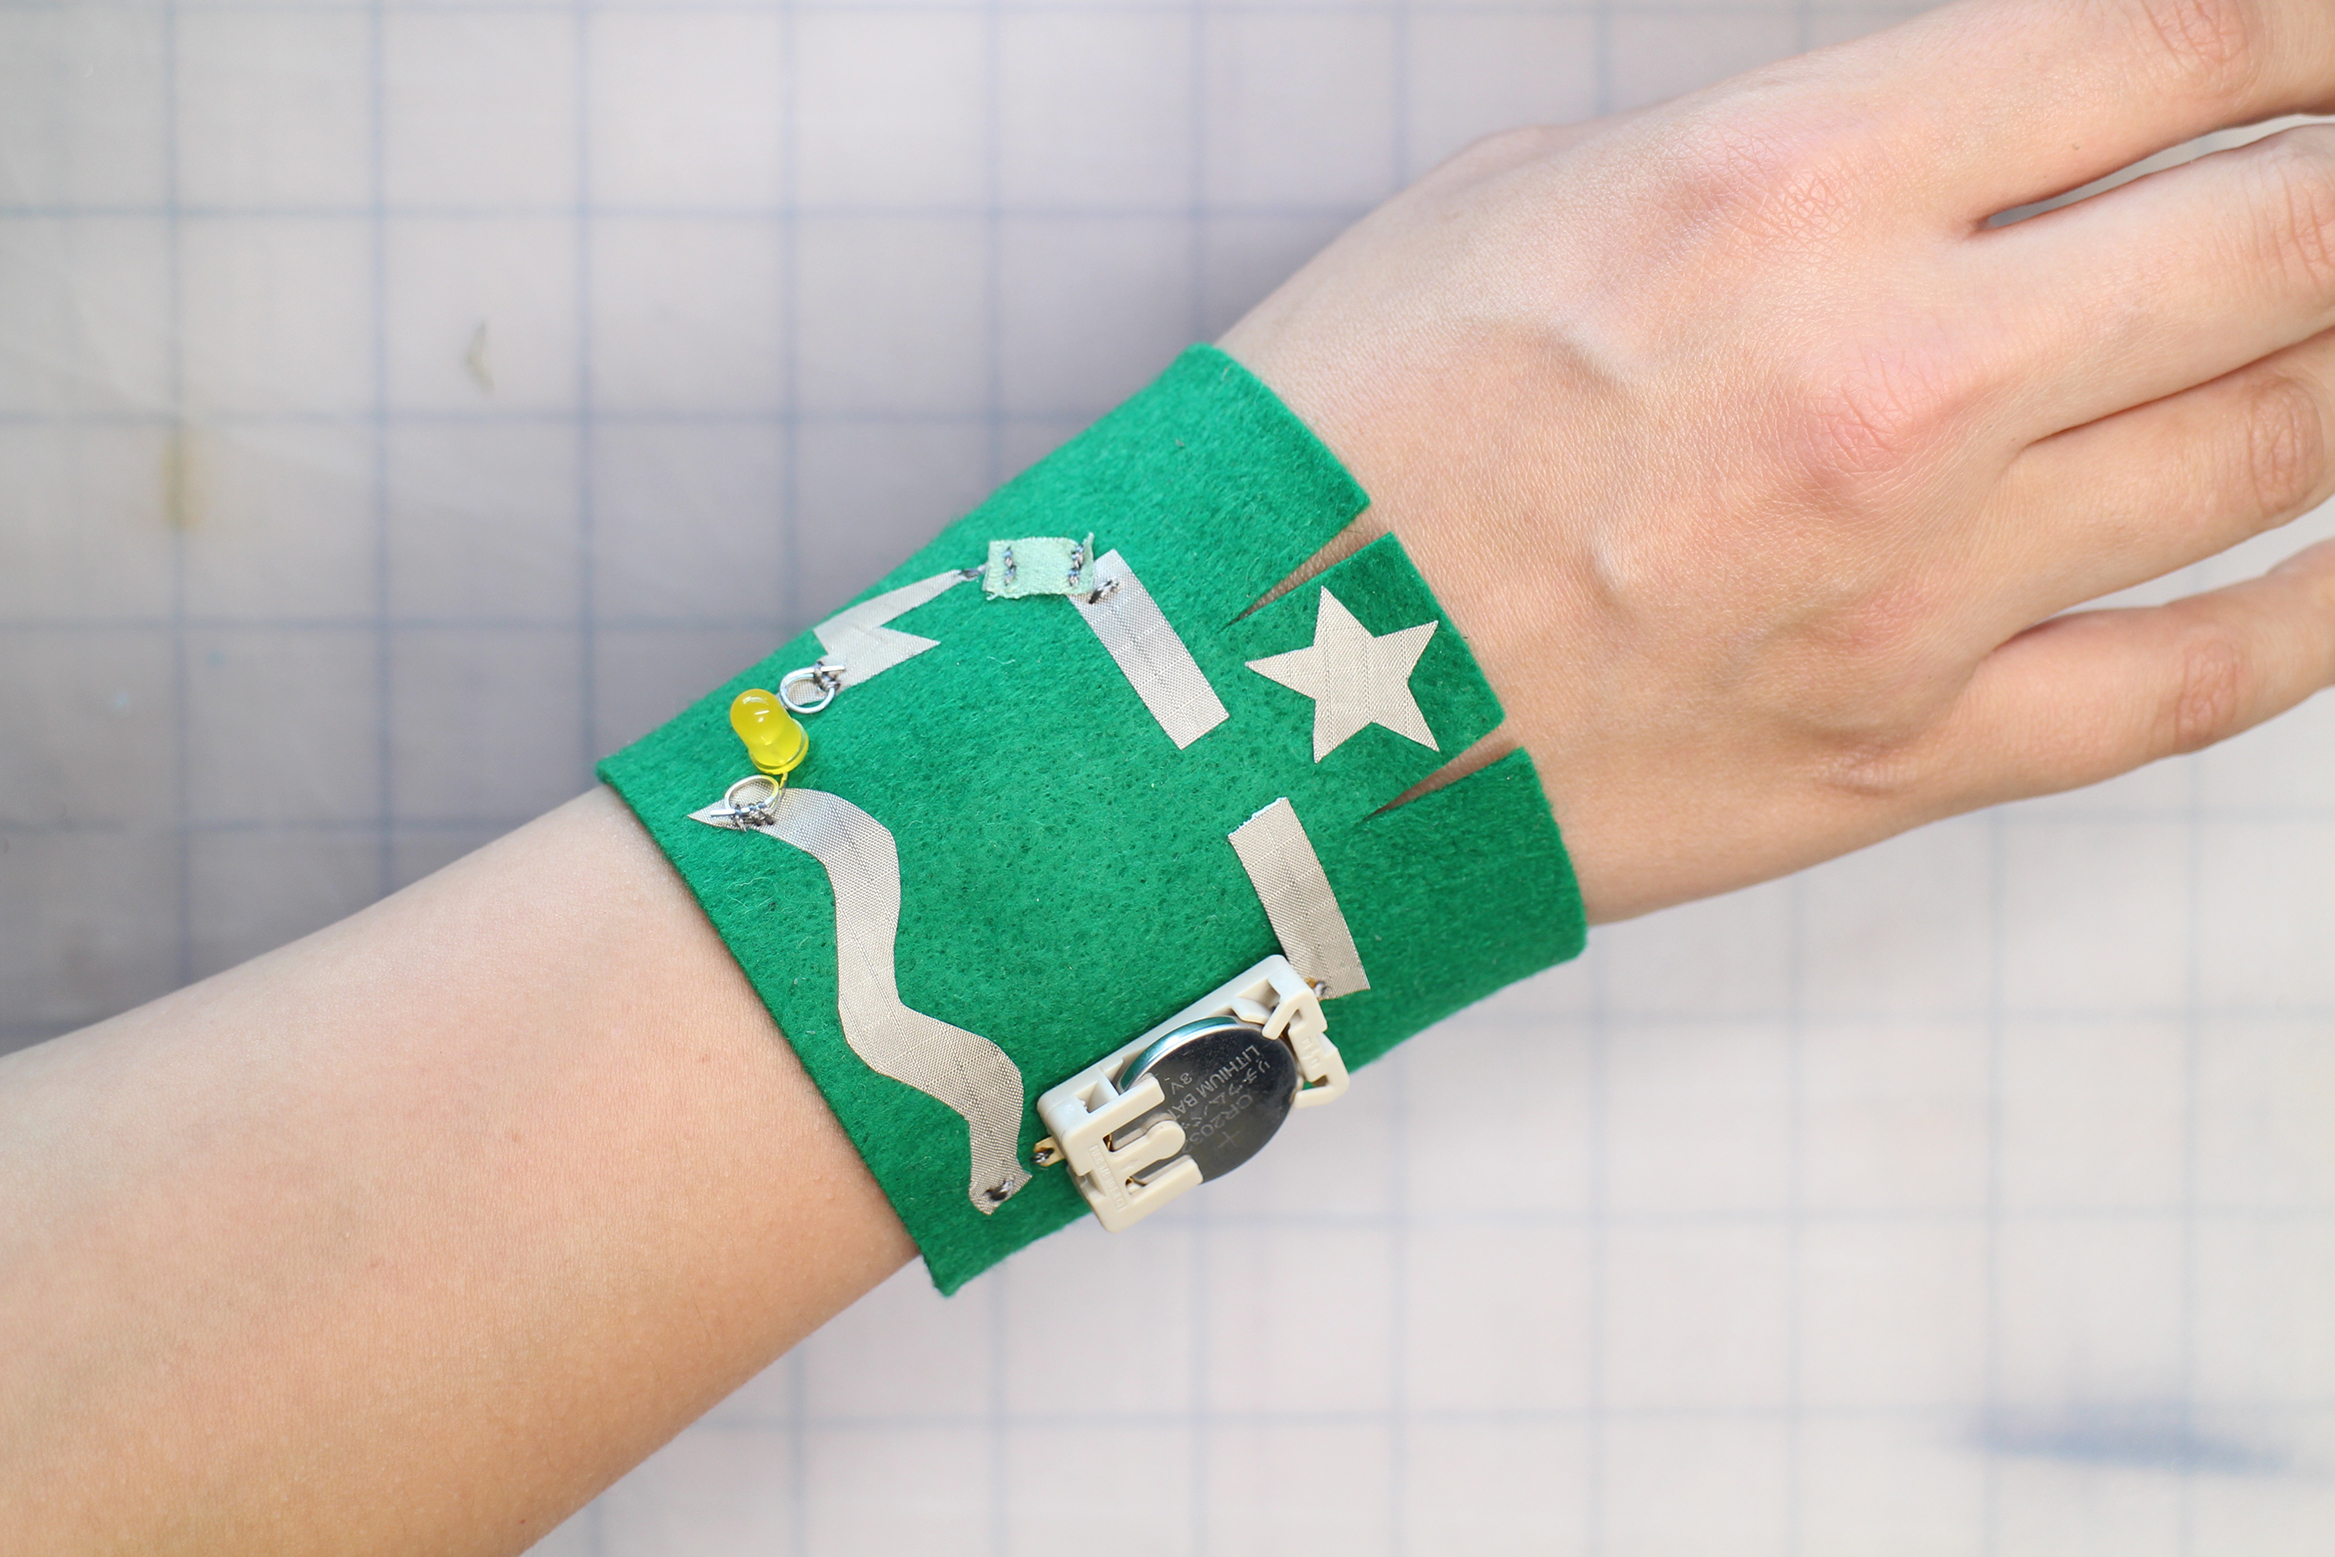
Soft Circuit
Using conductive thread or fabric create a simple circuit on the piece of fabric. Try making a switch in series.